RunCloud hosting account set up.
- Select a server location (choose server closest to clients location), go to that server in RunCloud
- Create new user specific to the new website under: Server>System User
- Username should be the domain with no TLD, and append “-usr” e.g. “ampv.com” would be “ampv-usr”
- Password should be 22 chars with upper/lowercase, letters, numbers, symbols, etc. click “Generate Password” to get strong pass. Use the 1pass generator if needed.
- Save credentials in 1password as “{clientdomain.com} FTP”
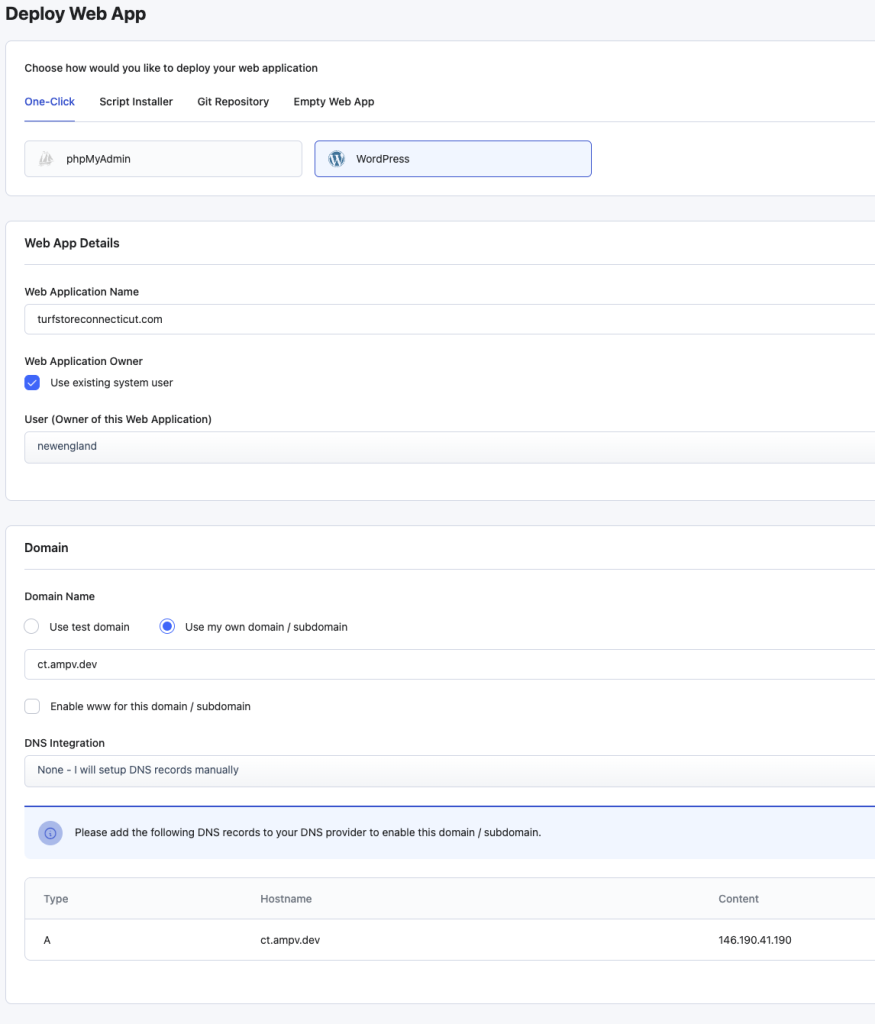
- Click Deploy New Web App
- Go to Web Applications and click Deploy New Web App
- Select WordPress option
- Web App Details
- Web Application Name: use domain name without the domain extension (i.e. ampv.com would be ampv
- User: select the user we just created
- Domain
- If it’s not a brand new website, please create a staging subdomain under our ampv.dev domain. It should be short, easy to remember, e.g. heater.ampv.dev, or sunstar.ampv.dev. If it’s a brand new website and domain, we can build under the new domain.
- DNS: None – I will setup DNS records manually
- Make note the DNS records for setting up staging URL.
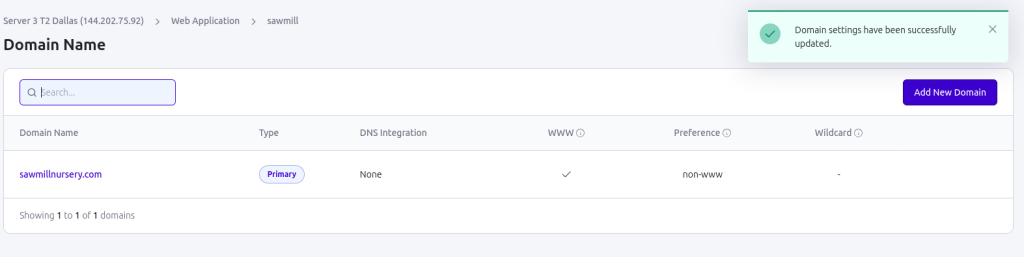
- After setting the main domain name, you need to click “actions” settings to enable “www” and then click “actions” settings again to set the preference to “www” or “non-www” to avoid redirect issues, see screenshot(s) below.
- WordPress
- Site Title: Company Name
- User: {company}_admin (Save the WordPress credentials in 1pass as “{domain.com} WordPress”)
- Pass: strong password with symbols etc. (Save the WordPress credentials in 1pass as “{domain.com} WordPress”)
- Admin Email: dev@ampv.com
- WordPress Multisite: No
- Database
- Leave defaults
- Backup
- Backup Label: domain name with backup appended (i.e. ampv_backup)
- Select RunCloud storage
- Backup Type: Incremental Backup
- Backup Frequency: 1 day
- Backup File Retention: 1 month
- Basic Settings and Stack
- Public Path; blank/default
- PHP Version; PHP 8
- Web Application Stack; NGINX + Apache2 Hybrid
- Stack Mode; Production
- Really only need to make sure we’re using the latest version of PHP, everything else should be default.
- Click Deploy and the RunCloud portion should be ready. Go ahead a login to the WP admin.
- Staging domain set up
- Login to dev@ampv.com Cloudflare
- Select ampv.dev domain
- Go to DNS>Records
- Create A record according to the DNS records that RunCloud gave us during set up
- Add staging URL to the ClickUp doc/tab named Projects Assets
- SSL
- Now we can login to RunCloud and set up SSL
- Go to SSL/TLS and click button “Use SSL/TLS Basic”
- Select Server Side HTTPS Redirection (so http redirects to https)
- Click Deploy SSL
- Takes a few minutes for the SSL to be deployed
See example screenshot below: