Image Processing Guide
If an image is above the fold, there are 2 major aspects to keep in mind. File Size and Resolution. In a lot of cases hero images are being used in the fold area.
Resolution – For heros this means we ideally will want 1500px + width. Depending on the style of the site, the height could range from 400-800px. Any other images that will be above the fold should be their maximum rendered size for the page you are displaying on.
File Size – Ideally we want to shoot for under 300kb, in a perfect world under 150kb. But this can be tricky depending on the detail of the photo. A compression tool such as https://compress-or-die.com/ and choosing webp will be our best bet.
BACKUP – Due to the potentially heavy modification of the photo, ensure that you have the original file either attached to the task or uploaded to the client’s creative folder.
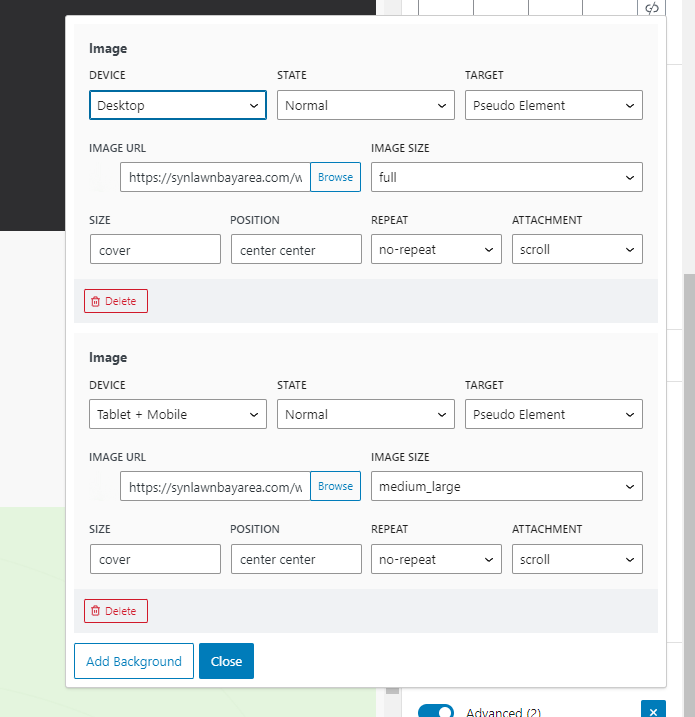
MOBILE – Depending on the builder we may have the option to set dedicated mobile images. Read the next section to learn about the automatic image generation that WordPress will do. It will work in most, but not all cases and you may need to upload a mobile specific version of any above the fold images to get the best results.
If an image may be used in other locations the method of resizing the image only as large as needed might not be the best situation. We ideally want to future proof and avoid needing to resize the image manually later on. In this situation it’s best to use WordPress’s automatic image size generation. While we could disable this feature, it is a core feature of WordPress that helps with image optimization for mobile devices.
In addition, this will also allow us to upload the image at a high resolution and then select auto-created smaller versions if needed for different page layouts vs needing to upload a different version for each time the design changes.
Because of this images should ONLY be resized** if they are needing a crop. It is still good practice to compress the image though before uploading as that will be the baseline file size for the smaller generated images. If you crop an image make sure to attach the image to the task or upload to the client’s creative folder.
**For images above the fold still make sure to upload an specific optimized version that follows the guidelines in the above tab.
Auto Image Generation – WordPress will automatically generate several smaller sizes of an image. You can see some of them under Settings > Media Settings. In some sites these values may be customized so it is good practice to check if you are unsure, but most sites they will be default.
- Thumbnail – 150px x 150px cropped
- Medium – 300px wide or 300px heigh, whichever is larger
- Medium Large – (Not on that settings page) 768px wide with no max height
- Large – 1024px wide or 1024px heigh, whichever is greater
- Full Size – Hard limit of 2560px or will be the exact dimensions of the image
Example 1 – Raw uploaded size – 932x650px – Will be 650px wide on the initial page
- Thumbnail – 150px x 150px
- Medium – 300px x 209px
- Medium Large – 768px x 535px
- This is the size we will select and use on the page and then manually set the width to 650px via the image width attributes.
- Full Size – 932px x 650px
Official Docs
If the image does not apply to the above 2 tabs then the best route is to resize to the size the image will be displayed. From there see how the file size is. If the image is under 50kb already then there is not much need to compress as heavily it as it will be lazy loaded. As discussed above WordPress will still generate smaller variants as well. It is still best practice to compress, but if the compression hurts the quality a lot, or it will take you too long to do so, then do not bother with compression.
Tab 2 content.
Coming soon!
Image Compression
Any images uploaded to clients websites must follow this process.
- Resize image to the actual size the image will display on the webpage (we don’t want images any larger than necessary).
- Use https://compress-or-die.com/ to optimize the image.
- Try moving the quality slider to the 35 position and see if the image is still high quality. If not, move to 50 and check again. I’ve found that 35 is a good threshold for photo type images. Logos and graphics will likely need to be higher.
- Save as .webp format
- When saving the image, file names should be short, descriptive and include targeted keywords naturally. See doc on “URL & Image File Naming” for more details.
- After uploading to WordPress, make sure you add a descriptive Alt Attribute. See doc on Image Alt Attributes for more details.
Mobile Optimization
In many cases, especially for hero images, we should optimize the image for mobile devices.
- During step 1 in the image optimization process above, crop a version of the image to best fit mobile devices and resize accordingly.
Gallery Images
Always use images that are high resolution, ideally 1500px width for large image size.
Image Cropping & Editing
- Image cropping: make sure the focus of the crop is the clients product or service. E.g. if it’s an artificial grass company, we don’t want half the image to be a road or dirt patch, we want to showcase the product. Play around with different crops and see what looks the best.
- Processing: while in photoshop try using the auto options under “Image” menu; Auto Tone, Auto Contrast and Auto Color. Often these auto options can improve the colors and contrast. In some cases this doesn’t work and we can try adjusting the Color Balance or Curves (we will create a process for this).